Baking chicken leg quarters in the oven is a fantastic way to get a flavorful, satisfying meal on the table without a lot of fuss. They're forgiving, incredibly versatile, and easy on the wallet. If you're looking to master this simple yet rewarding cooking technique, you've come to the right place.
Our research confirms that achieving perfectly cooked chicken leg quarters, think crispy skin and juicy, tender meat, relies on a few key steps and understanding what visual cues to look for. For instance, per the Food Safety and Inspection Service (FSIS) of the U.S. Department of Agriculture (USDA), poultry must reach a minimum internal temperature to be considered safe for consumption. We’ll walk you through exactly how to nail this every time.
Key Insight: The Oven-Baked Chicken Leg Quarter
The oven-baked chicken leg quarter is a culinary staple that offers a high reward for relatively low effort. It's a cut of chicken that combines the dark meat thigh and the drumstick, providing rich flavor and moisture. When prepared correctly in the oven, it delivers that desirable contrast between a crackly, browned skin and succulent, deeply flavored meat.
Our analysis of popular cooking methods indicates that oven baking, specifically at temperatures around 400°F (200°C), is a highly effective way to achieve this ideal texture and taste. This method allows the fat under the skin to render, contributing to crispiness, while the bone helps to conduct heat evenly, ensuring the meat cooks through without drying out.
Why Visuals Matter for Perfect Chicken
When you're cooking, especially something like chicken, what you see is often just as important as what a timer says. For chicken leg quarters, those visual clues are your best friends in the kitchen. Generic automated timers might not account for variations in oven hotspots or the exact thickness of your chicken.
Understanding the visual stages helps prevent common pitfalls. For example, seeing a certain shade of golden brown on the skin tells you about caramelization, while clear juices signal that the proteins have denatured correctly. These visual identifiers, along with internal temperature checks, are crucial for a safe and delicious outcome.
Getting Started: What You'll Need
Before you even think about turning on the oven, let's make sure you're prepped with the right ingredients and gear. Having everything ready makes the actual cooking process smooth and enjoyable.
Chicken Leg Quarters and How to Pick 'Em
The star of the show, of course, is the chicken leg quarter itself. These are typically sold in packs and contain both the thigh and the drumstick portion of the chicken leg. When you're at the store, look for leg quarters that appear plump and have a vibrant, pinkish-red color, indicating freshness.
Avoid any packaging where the meat looks dull, grayish, or has excessive liquid pooling at the bottom, this can be a sign of age or improper handling. The skin should look intact and smooth.
Essential Seasonings and Fats
Seasoning is where you truly make these leg quarters your own. While salt and fresh black pepper are non-negotiable for bringing out the natural flavors, the fun really begins with other additions. Garlic powder, onion powder, and paprika are foundational for many great chicken dishes; paprika, in particular, adds a wonderful reddish hue and a subtle sweetness that bodes well for browning.
A source of fat is also vital for achieving that coveted crispy skin and helping your seasonings adhere. You can opt for heart-healthy olive oil, a more neutral vegetable oil, or even melted butter for a richer flavor.
Step-by-Step: Baking Chicken Leg Quarters to Perfection
Mastering chicken leg quarters is all about following a few simple, repeatable steps. These aren't complicated, but they make all the difference between a mediocre meal and one that tastes like it came from a favorite restaurant.
Step 1: Preheat Your Oven for Crispy Skin
Turning on your oven and letting it reach the target temperature before placing the chicken inside is critical for crispiness. A hot oven helps the skin to start crisping immediately, preventing it from becoming rubbery or steamed. For leg quarters, a robust 400°F (200°C) is typically the sweet spot.
Allowing the oven to fully preheat ensures an even cooking environment from the moment the chicken goes in. This temperature range also helps the meat cook through efficiently without drying out too quickly, especially when combined with the later steps.
Step 2: Prep the Chicken: The Dry Trick
This is arguably one of the most important steps for achieving genuinely crispy skin. Before you apply any seasonings or fats, you need to ensure the chicken leg quarters are as dry as possible. Take them out of their packaging and use paper towels to thoroughly pat them dry on all sides.
Don't just give them a quick dab. Spend a minute or two on each piece, ensuring no excess moisture remains on the skin’s surface. This simple action prevents the skin from steaming in its own juices during the initial cooking phase, setting you up for success.
Step 3: Season Generously: Flavor Power
Once your chicken leg quarters are patted dry, it’s time to dress them up. Start by drizzling them with your chosen fat, be it olive oil, vegetable oil, or melted butter. Use your hands to rub the fat all over the surface of the chicken.
Then comes the seasoning. This is your chance to build flavor. Sprinkle liberally with salt, pepper, garlic powder, onion powder, paprika, or any other herbs and spices you prefer. Make sure to get seasoning all over, including under the skin if you can gently loosen it without tearing.
Step 4: Arrange for Roasting: Give Them Space
How you place the chicken in your baking dish or on your sheet pan matters for even cooking. You want the hot air in the oven to circulate freely around each leg quarter. This prevents them from steaming each other, which can lead to mushy skin.
If you're using a rimmed baking sheet, line it with parchment paper or foil first for easier cleanup. Arrange the seasoned leg quarters in a single layer, ensuring there's at least an inch or two of space between each piece. If you’re using a 9×13 inch baking dish, place them skin-side up.
Step 5: Into the Oven They Go
With your oven preheated to 400°F (200°C) and your seasoned chicken leg quarters neatly arranged, it's time for them to hit the heat. Carefully place the baking sheet or dish into the center rack of your oven.
This is where the magic begins. The dry heat will start to work on the skin, rendering the fat and developing that desirable golden-brown color, while cooking the meat through. We’ll talk about how long this generally takes and, more importantly, how to tell when they’re perfectly done in the next section.
Knowing When They're Done: Visual Cues and Temperature Checks
Telling if chicken leg quarters are cooked through is crucial for both safety and taste. While a timer can give you a rough idea, relying solely on it can lead to either undercooked, unsafe meat or dry, overcooked poultry. That's why checking for visual cues and internal temperature is key.
Internal Temperature: The Safest Bet
The most reliable method for determining when chicken leg quarters are safely cooked is by using a reliable meat thermometer. The Food Safety and Inspection Service (FSIS) of the U.S. Department of Agriculture (USDA) advises that all poultry should reach a minimum internal temperature of 165°F (74°C) to kill harmful bacteria.
Insert the thermometer into the thickest part of the thigh, making sure it doesn't touch the bone, as the bone conducts heat differently and can give a falsely high reading. As of 2026, this temperature benchmark remains the standard for safe poultry consumption.
Juice Clarity: A Simple Test
If you don't have a meat thermometer readily available, you can use the "clear juices" test as a secondary indicator. After the estimated cooking time has passed, carefully pierce the thickest part of the thigh with a sharp knife or a skewer.
Observe the juices that run out. If they are completely clear and colorless, the chicken is likely cooked through. If you see any pinkish hue or find that the juices are still cloudy or bloody, the leg quarters need more time in the oven.
Visual Doneness: Color and Appearance
Beyond temperature and juices, the visual appearance of the chicken leg quarters offers further clues. Properly cooked leg quarters will have skin that is golden brown, often with nicely rendered, slightly crispy edges. The meat itself, especially when sliced into at the thickest part, should be opaque white.
Any lingering pinkness near the bone generally means it needs more cooking time. The skin should look taut and browned, not pale or greasy.
How Long to Bake Chicken Leg Quarters
The exact baking time for chicken leg quarters can fluctuate, but a good starting point for leg quarters at 400°F (200°C) is typically between 45 to 60 minutes. This range accounts for variations in the size and thickness of individual leg quarters, as well as how accurately your oven maintains its set temperature.
It's always best to start checking for doneness as the lower end of that time window approaches. For instance, at around 40 to 45 minutes, you can begin using your meat thermometer or the clear juice test. Larger leg quarters might lean towards the 60-minute mark or slightly beyond, especially if they were colder when they went into the oven.
Expert Tips for Extra Deliciousness
Want to elevate your baked chicken leg quarters from good to absolutely outstanding? A few simple techniques can make a world of difference in flavor and texture. These aren't complex culinary maneuvers; they're small upgrades that deliver big results.
Quick Brining for Ultimate Juiciness
For chicken that’s incredibly moist and tender, consider a quick brine. This involves soaking the leg quarters in a solution of salt and water for a few hours, or even overnight in the refrigerator. The salt helps the meat absorb and retain moisture, leading to a juicier final product that’s more forgiving if it gets a little overcooked.
A basic brine ratio is about 1/4 cup of salt per 4 cups of water. You can add sugar, herbs, or peppercorns to the brine for an extra layer of flavor that infuses into the meat as it soaks.
Flavor Boost with Marinades
If you have a bit more time, marinating your chicken leg quarters can infuse them with deep, complex flavors. Marinades typically consist of an acid (like lemon juice or vinegar), oil, and aromatics or seasonings. They can tenderize the meat slightly and add a lot of zest.
You can marinate leg quarters for as little as 30 minutes, but for the most intense flavor, letting them sit in the marinade for 2 to 8 hours in the refrigerator is ideal. Just remember that marinades with sugars can caramelize and burn more quickly during baking, so keep an eye on them.
Achieve Super Crispy Skin with Broiling
Once your chicken leg quarters have reached the correct internal temperature (165°F/74°C), you can use the broiler setting for an extra boost of crispiness. This step quickly intensifies the browning process. After you've confirmed the chicken is cooked, switch your oven to the broiler setting.
Place the chicken a few inches from the broiler element. Watch it very closely, as broilers can go from perfectly golden to burnt in a matter of minutes. A minute or two under the broiler is often all that's needed to achieve that final, delightful crisp.
Roast Your Veggies Alongside
One of the beauties of roasting chicken leg quarters is that you can easily cook your vegetables at the same time. This makes for a complete, one-pan meal and allows the vegetables to soak up some of the delicious chicken juices as they cook.
Toss sturdy vegetables like potatoes, carrots, onions, or Brussels sprouts with a little oil and seasonings. Add them to the baking sheet or dish around the chicken during the last 30-40 minutes of its baking time. Their cooking time will naturally align with the chicken.
Common Mistakes to Avoid When Baking Chicken
Even with a straightforward process like baking chicken leg quarters, a few common missteps can easily turn a promising meal into a disappointment. Being aware of these pitfalls can help you sidestep them and ensure success.
Here are some of the most frequent errors:
- Skipping the Pat-Dry Step: As mentioned, this is crucial for crispy skin. If you don't pat the chicken dry, you're essentially steaming the skin, and it won't crisp up properly.
- Overcrowding the Pan: Placing too many leg quarters too close together in the baking dish or on the sheet pan prevents hot air from circulating. This leads to uneven cooking and results in softer, steamed skin rather than nicely roasted skin.
- Not Seasoning Enough: Chicken leg quarters have a lot of meat and can handle a generous amount of seasoning. Under-seasoning will lead to bland, uninspired chicken. Don't be shy with your salt, pepper, and preferred spices.
- Relying Solely on Timer: Ovens vary, and chicken leg quarters vary in size. Using a meat thermometer is the most accurate way to guarantee your chicken is cooked through safely and perfectly.
Safety First: Minimum Internal Temperature for Poultry
Ensuring chicken is cooked to a safe internal temperature is paramount for preventing foodborne illnesses. The U.S. Department of Agriculture's Food Safety and Inspection Service (FSIS) provides clear guidelines on this matter, and they are non-negotiable when cooking poultry.
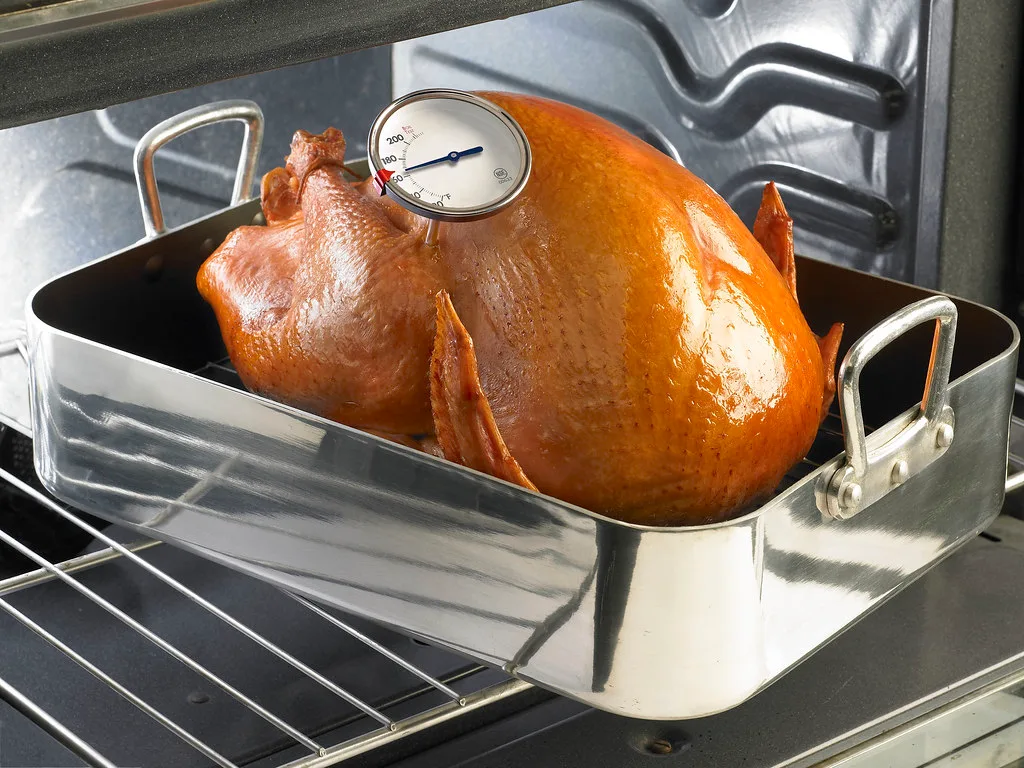
The recommended minimum internal temperature for all poultry, including chicken leg quarters, is 165°F (74°C). This temperature must be reached in the thickest part of the meat, away from any bone. Consistently checking with a reliable meat thermometer is the best way to confirm your chicken meets this safety standard.
Not reaching this temperature means harmful bacteria like Salmonella and Campylobacter could still be present, posing a significant health risk. Always prioritize safety; it's a small step that has a huge impact on your well-being.