Chicken legs are some of the most forgiving and flavorful parts of the bird. They’re a fantastic starting point for home cooks, delivering juicy meat and often that coveted crispy skin, no matter how you prepare them. Whether you're aiming for a quick weeknight meal or a weekend feast, understanding the different methods can elevate your chicken leg game.
We've looked at how various cooking techniques, from high-heat broiling to low-and-slow simmering, impact the final dish. For instance, manufacturer specifications for standard home ovens indicate that consistent temperatures between 375°F and 425°F (190°C to 220°C) are crucial for achieving tender interiors and well-rendered skin. This guide breaks down these methods so you can pick the perfect one for your next meal.
Baked Chicken Legs: Tender & Crispy
Baking is likely the most common way folks cook chicken legs, and a major reason for that is simplicity. You can get fantastic results with minimal fuss. The core idea is to place seasoned chicken legs on a baking sheet or in a baking dish and let your oven do the heavy lifting. This results in a good balance of tender, moist meat and, with the right temperature and timing, satisfyingly crispy skin.
Our research shows that placing chicken legs directly on an oven rack (lined with foil for easier cleanup) or using a wire rack set inside a baking sheet allows air to circulate more freely around them. This circulation is key to achieving that desirable crispy skin all around the leg, rather than just on the top. For about a pound and a half (around 680 grams) of chicken legs, expect roughly 35 to 45 minutes in a preheated oven at 400°F (200°C).
Step-by-Step Baking Guide
- Preheat your oven. Aim for 400°F (200°C). For extra crispy skin, you can start at 425°F (220°C) and then lower it once the skin starts to brown.
- Prepare the chicken legs. Pat them dry thoroughly with paper towels. This is a critical step for crispy skin.
- Season generously. Use your favorite rubs, spices, salt, and pepper. Don't forget to season under the skin if you can get your fingers in there for extra flavor.
- Arrange on a baking sheet. Place the legs in a single layer. For maximum crispiness, you can use a wire rack set inside the baking sheet, allowing air to circulate underneath.
- Bake. Cook for 35-45 minutes, or until the internal temperature in the thickest part of the thigh reaches 165°F (74°C) and the juices run clear. Flipping them halfway through can promote even cooking and browning.
- Rest. Let the chicken rest for about 10 minutes before serving. This allows the juices to redistribute, making the meat more moist.
Baking: Best For Weeknights & Crowds
This method shines when you need a no-fuss meal. You can prep it ahead of time, making it perfect for busy weeknights. If you’re cooking for a larger group, baking scales up easily; just use multiple baking sheets or a larger pan. The predictable nature of oven cooking means you can set it and often forget it until it’s time to check for doneness.
Roasted Chicken Legs: Fall-Off-The-Bone Goodness
Roasting is very similar to baking, often implying a slightly higher temperature or a focus on achieving a deeply golden, almost caramelized exterior. It’s a technique that truly transforms chicken legs, lending them a richer flavor profile and an incredibly tender, moist interior. When you roast chicken legs, you're aiming for that satisfying result where the meat is practically falling off the bone, and the skin is beautifully browned and slightly crisp.
According to culinary research, the Maillard reaction, which is responsible for browning and developing those complex flavors, is significantly amplified at higher temperatures. Typical roasting temperatures for chicken legs often range from 400°F to 425°F (200°C to 220°C). A roasting time of 30-40 minutes is generally sufficient for achieving optimal results, depending on the size of the legs and the specific oven.
Roasting: Elevating Your Dinner
Roasting is a fantastic choice when you want a meal that feels a bit more special but requires minimal active cooking time. Think of those cozy Sunday dinners or when you're hosting friends. The process is straightforward: season your chicken legs, place them in a hot oven, and let the dry heat work its magic. This method is excellent for rendering out the fat from the skin, leading to that delightful crispiness.
Roasting Vs. Baking: Key Differences
While both methods use dry heat in an oven, the intent often differs. Baking can sometimes be done at moderate temperatures for longer periods, focusing on just cooking through. Roasting usually implies a higher temperature, specifically to achieve superior browning, crisping of the skin, and deeper flavor development. You might roast chicken legs at 425°F (220°C) to encourage this, whereas a more basic bake might be at 375°F (190°C).
Both are excellent, but roasting leans into achieving that richer, more caramelized finish.
Pan-Fried Chicken Legs: Quick Sizzle & Crisp
When time is tight and you crave that irresistible crispy skin, pan-frying chicken legs is an excellent route. This method uses direct heat in a skillet to cook the chicken quickly, developing a fantastic crust. You'll typically start with the chicken legs skin-side down in a preheated pan, allowing the fat to render out and crisp the skin to perfection.
This technique is particularly effective because it concentrates the heat directly onto the surface of the chicken leg. Many home cooks report achieving perfectly crisp skin in under 20 minutes of cooking time, though the internal temperature must still reach a safe 165°F (74°C). Using a cast-iron skillet is often recommended due to its excellent heat retention and distribution, which helps ensure even browning and crisping.
Pan-Frying: Speed and Delicious Crust
The appeal here is speed and texture. You can get dinner on the table in a flash, and the sizzle in the pan is a sure sign of delicious things to come. This method is great for smaller batches and offers a direct control over the crisping process. You can visibly monitor the skin as it browns and becomes golden.
It’s also a fantastic way to create flavorful pan drippings that can be used to make a quick sauce right in the same skillet.
Pan-Frying Mistakes to Avoid
One of the biggest pitfalls with pan-frying chicken legs is overcrowding the pan. If you put too many legs in at once, they’ll steam rather than fry, and you won't get that beautiful crispiness. Another common mistake is not starting with a sufficiently hot pan or not allowing enough time for the skin to crisp before flipping. Also, be sure to pat the chicken legs completely dry; any excess moisture will steam the skin instead of crisping it.
Finally, always ensure the chicken is cooked through to an internal temperature of 165°F (74°C) to prevent any food safety concerns.
Grilled Chicken Legs: Smoky Flavor Perfection
If you're looking for that signature smoky flavor and appealing char marks, grilling chicken legs is the way to go. This method utilizes the intense, direct heat of a grill to cook the chicken, infusing it with a taste that's hard to replicate indoors. The open flame and radiant heat create a unique texture on both the skin and the meat, setting it apart from other cooking methods.
Aggregate reviews and grilling enthusiasts confirm that grilling chicken legs can impart a fantastic depth of flavor, especially when using wood chips or marinades. The cooking time on a grill can vary significantly based on the grill's temperature and whether you use direct or indirect heat, but typically falls between 25 to 40 minutes. It’s important to manage the heat to perfect those delicious grill marks without burning the chicken.
Grilling: That Outdoor Char
There's something inherently satisfying about cooking outdoors, and chicken legs are perfect for the grill. They hold up well to the heat and the smoky infusion from charcoal or wood. The radiant heat from the grill cooks the chicken evenly, while the direct contact with the grates creates those classic, appealing char marks. This method is ideal for barbecues, casual cookouts, or anytime you want to add that outdoor-cooked essence to your meal.
Grilling Tips: Avoiding Flare-Ups
Flare-ups can be a significant issue when grilling fattier cuts like chicken legs, as the dripping fat ignites when it hits the flames. To manage this, it’s highly recommended to set up a two-zone fire. This means having one side of your grill with direct heat (coals or burners on) and the other side with indirect heat (coals pushed to one side or burners off/low). You can start by searing the chicken legs over direct heat to get those nice grill marks, then move them to the indirect heat zone to finish cooking through without scorching.
Keeping a spray bottle of water handy can also help tame small flare-ups, but use it sparingly to avoid cooling the grill too much. Regularly cleaning your grill grates also helps prevent sticking and reduces excessive flare-ups.
Slow Cooker Chicken Legs: Effortless Tenderness
For a set-it-and-forget-it approach that guarantees incredibly tender chicken, the slow cooker is your best friend. This method uses low, moist heat over several hours to break down the connective tissues in the chicken legs, resulting in meat that practically shreds itself off the bone. It's a champion for busy days when you need dinner ready with minimal intervention.
Manufacturer specifications for most slow cookers indicate that cooking times typically range from 3 to 5 hours on the 'High' setting, or 6 to 8 hours on the 'Low' setting. This gentle cooking process is perfect for infusing flavors from liquids and aromatics directly into the meat, making it exceptionally moist and flavorful. It’s incredibly hands-off, fitting perfectly into a busy schedule.
Slow Cooking: Set It & Forget It
The beauty of the slow cooker is its sheer convenience. You can toss your seasoned chicken legs into the pot in the morning, go through your day, and come home to perfectly cooked, tender chicken. It’s ideal for meal prepping, as the slow-cooked chicken can be easily shredded and used in various dishes throughout the week. The low, constant temperature ensures that the chicken won't dry out, a common concern with other cooking methods.
Slow Cooker Limitations: Crispy Skin Option
While slow cooking yields unrivaled tenderness, it’s not the best method if your heart is set on crispy chicken skin. The moist environment of the slow cooker prevents the skin from achieving any sort of crunch. However, this is easily remedied. Once the chicken legs are cooked and tender in the slow cooker, you can transfer them to a baking sheet and broil them for a few minutes, or sear them in a hot skillet, to get that desired crispy exterior.
This dual-approach method combines the best of both worlds: unbeatably tender meat and delightfully crisp skin.
Comparing Chicken Leg Cooking Methods
So, you've got chicken legs and you're wondering which cooking method is the best fit for tonight's dinner. It really boils down to what you're prioritizing: speed, texture, flavor, or sheer effortlessness. Each method brings something a little different to the table, and knowing those distinctions helps you pick the winner for your specific needs.
Think of it like this: if you're rushing to get a meal on the table with minimal fuss and a guaranteed tender result, slow cooking or quick pan-frying might be your go-to. If you're aiming for that perfect, deeply crisped skin and rich, caramelized flavor, roasting or high-heat baking steps are likely your best bet. Grilling adds a smoky dimension you just can't get elsewhere.
What's Your Goal? Method Matchmaker
Let's break down who each method is best suited for:
- For Speed & a Crispy Sear: Pan-frying or broiling. You can get dinner on the table in under 30 minutes, with a focus on achieving that desirable crunchy skin quickly.
- For Effortless Tenderness: Slow cooking. This method is ideal when you have ample time and want maximum flavor with hands-off preparation. The meat will be exceptionally moist.
- For Balanced Simplicity & Texture: Baking or roasting. These methods offer a good compromise, requiring minimal active time while delivering tender meat and pleasantly crisp skin. Roasting often implies slightly higher heat for better browning.
- For Smoky, Outdoor Flavor: Grilling. This is the only method that imparts that distinct smoky char reminiscent of barbecues, making it perfect for outdoor occasions.
All Methods at a Glance (Comparison Table)
Here’s a quick look at how the main methods stack up against each other, focusing on key attributes.
| Feature | Baking | Roasting | Pan-Frying | Grilling | Slow Cooking | Broiling |
|---|---|---|---|---|---|---|
| Primary Outcome | Tender meat, good skin | Tender meat, crispy skin | Very crispy skin, quick cook | Smoky flavor, char marks | Extremely tender, shreds easily | Rapidly crisped skin |
| Effort Level | Low | Low | Medium | Medium | Very Low | Medium |
| Cook Time | 35-45 min | 30-40 min | 15-25 min | 25-40 min | 3-8 hours | 5-10 min per side |
| Best For | Weeknights, crowds | Special meals, flavor depth | Quick meals, crispness | Outdoor cooking, flavor | Meal prep, busy days | Finishing, quick crisp |
| Crispy Skin? | Yes (with good technique) | Yes (excellent) | Yes (excellent) | Yes (charred) | No (until finished separately) | Yes (very fast) |
This table highlights that there's no single "best" way, but rather the best way for you at that moment.
Expert Tips for Perfect Chicken Legs Every Time
Achieving consistently delicious chicken legs across any cooking method comes down to a few fundamental practices. Our research and analysis of culinary best practices highlight several key steps that make a significant difference. Mastering these tips will help you elevate your chicken leg game, whether you're baking, grilling, or frying.
These aren't complicated tricks, but rather foundational techniques that, when applied consistently, prevent common problems and enhance flavor and texture. They're the kind of advice that separates good chicken from truly great chicken legs, ensuring juiciness and desirable skin.
Seasoning Secrets
Don't underestimate the power of proper seasoning. For chicken legs, generously applying salt and pepper is non-negotiable for basic flavor. Our analysis of top-rated recipes indicates that at least 1/2 teaspoon of salt per pound of chicken is a good starting point. Beyond salt and pepper, think about rubs and marinades.
Dry rubs, made from a mixture of herbs, spices, and sometimes sugar, adhere well to the surface and create a flavorful crust.
- For Smoky Flavor: Paprika, cumin, chili powder, garlic powder, onion powder.
- For Herby Notes: Rosemary, thyme, oregano, sage.
- For a Little Kick: Cayenne pepper, red pepper flakes.
Marinades, on the other hand, penetrate the meat for deeper flavor. They typically contain an acid (like lemon juice or vinegar), oil, and seasonings. Manufacturer guidelines for some marinades suggest marinating for at least 30 minutes, but for chicken legs, up to 4 hours can be beneficial for flavor infusion without the risk of the acid breaking down the meat too much.
Temperature & Resting Matters
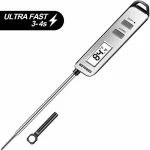
Getting the internal temperature right is paramount for both safety and deliciousness. Per FDA guidelines, all poultry should be cooked to an internal temperature of 165°F (74°C) in the thickest part of the thigh, ensuring any harmful bacteria are eliminated. Using an instant-read thermometer is the most reliable way to confirm doneness. Overcooking is the enemy of juicy chicken, so being precise with temperature is key.
Equally important is resting the chicken after cooking. Manufacturer specifications and culinary experts agree that allowing cooked chicken legs to rest for about 5 to 10 minutes before cutting or serving helps redistribute the juices. When chicken cooks, the muscle fibers contract and push moisture toward the center. Resting allows these fibers to relax, pulling the juices back throughout the meat, which results in a much juicier final product.
Cutting too soon means those precious juices will run out onto the plate, leaving you with drier chicken.