When you're pondering the best ways to cook a beef tenderloin, it's easy to feel a bit overwhelmed by the options. We've all been there, staring at this beautiful piece of meat and wanting to do it justice. The good news is, beef tenderloin is exceptionally forgiving, and multiple methods deliver fantastic results.
Our research confirms that the primary goal is to achieve incredibly tender, juicy meat with a flavorful exterior. When choosing a method, consider the time you have and the level of kitchen involvement you prefer. As of 2026, manufacturer specifications for digital meat thermometers, like those recommended by the USDA for food safety, show they offer rapid temperature readings accurate to within ±1°F (±0.5°C). This precision is key for nailing beef tenderness.
Why So Many Ways to Cook a Beef Tenderloin?
Wondering why there isn't just one definitive way to cook this prime cut? It comes down to flavor development and texture preferences. Beef tenderloin is prized for its lean composition and inherent tenderness, meaning it cooks relatively quickly. This speed is a double-edged sword; it’s great for efficiency but requires careful temperature management to prevent it from becoming dry.
Different cooking techniques coax out unique qualities. For instance, high-heat searing creates a complex, savory crust through the Maillard reaction, while slow roasting ensures even cooking throughout. The best method often depends on whether you prioritize intense exterior flavor, uniform doneness from edge to center, or a hands-off approach.
The Low and Slow Roast: Your Oven's Best Friend
This is the quintessential method for a whole beef tenderloin, often associated with holiday dinners and special feasts. It’s approachable and forgiving, making it a favorite for many home cooks.
Gentle Heat for Even Results
Low and slow oven roasting involves placing a seasoned tenderloin into a preheated oven at a relatively moderate temperature, typically between 250°F and 325°F (120°C, 160°C). The idea is to cook the meat gradually and evenly from the outside in. Because the heat is not blast-furnace intense, the internal temperature rises slowly, allowing the outer and inner portions to reach your desired doneness more simultaneously. This minimizes the common problem of an overcooked exterior surrounding a perfectly rare interior.
Minimal Fuss, Maximum Flavor Potential
Once the tenderloin is seasoned and in the oven, the active cooking time is largely hands-off. You’ll need to monitor the internal temperature with a reliable meat thermometer, but otherwise, you're free to prepare your sides or relax. While this method might take longer than others, the payoff is a consistently tender and juicy roast. You can enhance flavor by rubbing the tenderloin with herbs and spices, or by adding aromatic vegetables to the roasting pan.
Pan-Sear & Oven Finish: Building That Delicious Crust
This technique is a powerhouse for flavor, combining the intense browning of a stovetop sear with the consistent cooking of an oven finish. It's a fantastic option when you want that deeply caramelized exterior alongside a perfectly cooked interior.
The Power of a Hot Skillet
The process begins with preheating a heavy, oven-safe skillet, usually cast iron, to a very high temperature. The seasoned beef tenderloin is then seared intensely on all sides, developing a rich, brown crust. This high-heat browning, known as the Maillard reaction, creates a cascade of complex flavors that a simple roast can't replicate. It also helps to seal in the juices, contributing to a more succulent final product.
Speed and Flavor Combined
After achieving a beautiful crust on all sides, the entire skillet is transferred to a preheated oven. The oven's steady heat then takes over, gently cooking the interior of the tenderloin to your desired temperature. This two-step approach is often quicker than a pure oven roast because the initial searing brings the meat closer to its final temperature. A key benefit is that the vigorous sear provides a fantastic textural contrast to the tender, yielding meat inside.
The Reverse Sear: Unbeatable Evenness and Texture
The reverse sear has gained significant popularity for its ability to produce exceptionally evenly cooked meat with a perfect crust. It flips the traditional searing method on its head, starting with gentle cooking before the final sear.
Low Oven First, Then a Quick Sear
For this method, the beef tenderloin is seasoned and then placed in a low-temperature oven, typically around 200-275°F (95-135°C). It cooks slowly until it’s about 10-15°F below your target final temperature. After this slow-roast phase, the tenderloin is removed from the oven, rested briefly, and then seared rapidly on all sides over very high heat. This can be done in a screaming-hot cast iron skillet or on a grill.
Why It's a Game Changer for Tenderness
This technique is celebrated for its remarkable control over internal temperature. Because the meat is brought up to temperature slowly and gently, the resulting cook is incredibly uniform from the very center to the outer edges. There’s minimal grey banding, and the meat is consistently tender throughout. The final quick sear ensures you get that desirable crispy, flavorful crust without overcooking the interior you worked so hard to perfect.
It's often considered more forgiving than traditional methods, making it easier to achieve restaurant-quality results at home.
Grilling Grace: Smoky Char and Outdoor Flavor
When the weather is good and you have access to a grill, cooking beef tenderloin outdoors offers a unique flavor profile. The open flame and potential for smoky aromas add a dimension that indoor cooking simply can't match.
Indirect Heat for Control
Similar to oven roasting, the most effective way to grill a whole tenderloin is to use indirect heat. This means you set up your grill so the meat isn't directly over the coals or burners. You might achieve this by using only half the burners on a gas grill or by banking coals to one side on a charcoal grill. This setup allows the tenderloin to cook through gently, much like in an oven, preventing the exterior from charring before the interior is done.
Direct Heat for the Perfect Sear
For that desirable crust, you can begin by searing the tenderloin over direct, high heat for a minute or two per side. Once a good sear is achieved, move the tenderloin to the indirect heat zone to finish cooking to your desired internal temperature. This combination of searing and indirect cooking offers the best of both worlds: a robust, flavorful crust and a tender, juicy interior, all with that distinctive grilled flavor. Temperature control on a grill can be more dynamic than an oven, so consistent monitoring with a meat thermometer is essential.
Choosing Your Tenderloin Adventure: A Quick Look
So, you've got a better handle on the main cooking methods. Now, let's figure out which one is your perfect match. Think about what matters most for your meal and your kitchen.
What's Your Priority?
If you want the most forgiving, hands-off method and have plenty of time, the low and slow oven roast is your friend. For incredible flavor and a beautiful crust achieved relatively quickly, the pan-sear and oven finish is hard to beat. If you're aiming for absolute perfection in evenness and texture with a bit more active time, the reverse sear is likely your winner. For that signature smoky char on a nice day, the grill is always a solid choice.
Method Matchmaker
- Best for beginners: Low and slow oven roast or pan-sear and oven finish. They offer good control and aren't overly complicated.
- Best for maximum flavor: Pan-sear and oven finish or grilling, due to the intense browning and smoky char.
- Best for even cooking: Reverse sear. Its two-stage process minimizes the risk of uneven doneness.
- Best for minimizing active time: Low and slow oven roast. Once it's in, you can focus on other things.
Mastering the Cook: Essential Tips for Any Method
No matter which path you choose, a few universal truths will elevate your beef tenderloin game. These aren't complicated, but they make a world of difference.
Room Temp is Key
Give your beef tenderloin time to come up to room temperature before cooking. Take it out of the refrigerator about 45 to 60 minutes beforehand. This helps it cook more evenly, ensuring the center reaches your target temperature without the outside becoming overdone. A cold center in a large roast is a recipe for uneven cooking.
Seasoning is Crucial
Don't be shy with your seasoning. A generous amount of salt and freshly cracked black pepper is the foundation. These simple seasonings not only enhance the natural flavor of the beef but also help create a more appealing crust. You can also add other herbs like rosemary or thyme, or garlic powder, but a solid salt-and-pepper base is non-negotiable.
Temperature is Everything: Using Your Meat Thermometer
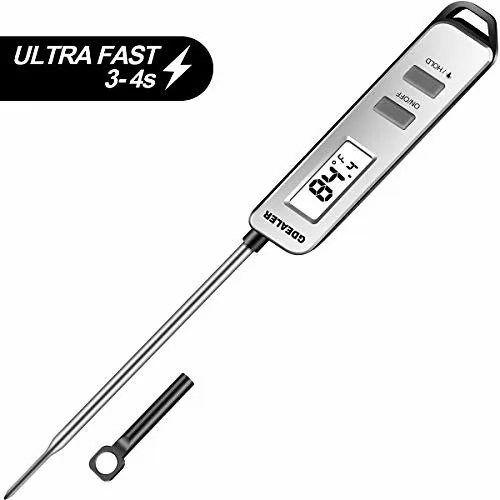
Achieving perfect doneness relies entirely on accurate temperature readings. A reliable digital meat thermometer is your most valuable tool here, as it gives you precise readings in real-time.
- Insert the thermometer into the thickest part of the tenderloin, avoiding any bone if present (though tenderloin is typically boneless).
- Remember that the internal temperature will rise by 5-10°F (3-5°C) as the meat rests after cooking (carryover cooking).
- Aim for these temperatures before resting:
- Rare: 120-125°F (49-52°C)
- Medium-Rare: 130-135°F (54-57°C)
- Medium: 135-140°F (57-60°C)
The Magic of Resting Your Meat
This is perhaps the most overlooked, yet critical, step. Once your tenderloin reaches its target internal temperature, remove it from the heat source. Tent it loosely with aluminum foil and let it rest for at least 10-15 minutes. During this time, the muscle fibers relax, allowing the juices to redistribute throughout the roast.
If you slice too soon, those juices will escape onto your cutting board, leaving you with a dry final product.
Potential Pitfalls: Mistakes to Steer Clear Of
Even with the best intentions, a few common blunders can sabotage your beef tenderloin. Knowing these upfront can save you from disappointment.
Overcooking Calamity
The number one mistake is overcooking. Because beef tenderloin is so lean, it dries out quickly once it passes medium doneness. Always pull your roast from the heat a few degrees before your target temperature, as carryover cooking will continue to raise it. Err on the side of caution; it's easier to put it back on for a few more minutes than to fix an overcooked roast.
The Rush to Cut
Another frequent error is slicing the tenderloin too soon after cooking. As mentioned in the resting tips, this allows essential moisture to leak out. Patience during the resting period is crucial for a succulent bite. The 10-15 minute rest is non-negotiable for a tenderloin cooked properly.