Understanding how to cook a beef rump roast is all about transforming a solid cut of meat into something tender, flavorful, and satisfying. When done right, it’s a humble yet impressive meal that doesn’t require a lot of fuss. Our research indicates that success hinges on a few key techniques, particularly around preparation, searing, and temperature control.
As of 2026, manufacturers like ThermoPro and ThermoWorks offer digital meat thermometers that are essential tools for achieving perfect results every time. These devices provide accurate readings, ensuring your roast reaches its ideal internal temperature without guesswork. Let's break down what you need to know to tackle this cut with confidence.
Picking Your Perfect Beef Rump Roast
Choosing the right rump roast is foundational to a great outcome. Not all roasts are created equal, and understanding what to look for can make a significant difference. Our analysis of butcher recommendations and consumer feedback highlights a few critical factors.
- Marbling: This is your roadmap to flavor and moisture. Look for those fine, white flecks of fat interspersed throughout the lean muscle. The more evenly distributed the marbling, the more tender and succulent your roast will be. A roast with minimal marbling will often turn out drier and less forgiving.
- Thickness: Aim for a roast that’s at least 3 inches thick. Thicker roasts are generally easier to manage because they allow for a good sear on the outside while keeping the interior at your desired doneness. Thinner cuts can overcook before you even get a proper crust.
- Beef Grade: If your butcher or store offers grading, seek out USDA Choice or Prime. These grades signify better marbling and overall quality, which translates directly into a more enjoyable eating experience. A higher grade roast is often more forgiving of slight cooking errors.
Prep Work: Building Flavor from the Start
Before this beauty even thinks about hitting the heat, a little attention to detail in the preparation phase lays the groundwork for fantastic flavor and texture. Skipping these steps is a common mistake that can lead to a less-than-ideal final product.
Bringing Your Roast to Room Temperature
This step is crucial for even cooking. Pull your rump roast from the refrigerator about an hour before you plan to start cooking. A cold roast hitting a hot pan or oven will cook unevenly, the outside will start to brown and cook before the center has warmed up. Allowing it to come closer to room temperature ensures the heat penetrates the meat more uniformly.
Patting Dry for the Perfect Sear
Moisture is the enemy of a good sear. Use paper towels to thoroughly pat the entire surface of the roast dry. You want to remove as much surface moisture as possible. This allows the Maillard reaction, the browning process that creates complex flavors and that sought-after crust, to occur efficiently, rather than getting a steamed effect.
Seasoning Generously: Your Flavor Foundation
Don't be shy with the seasoning. For a rump roast, a good amount of coarse sea salt or kosher salt and freshly ground black pepper is essential. Rub the salt and pepper all over the roast, ensuring it coats every surface, including the ends. This initial seasoning builds a flavor base that penetrates the meat as it cooks.
The Sear: Crafting That Irresistible Crust
Achieving a beautiful, deep brown crust on your rump roast is more than just for looks; it's where a significant amount of flavor develops. This step is non-negotiable for a delicious roast.
Getting Your Pan and Oil Piping Hot
You'll need a heavy-bottomed pan, ideally cast iron, for this. Place it over medium-high heat and let it get thoroughly hot. Add a high-smoke-point oil, like canola, grapeseed, or avocado oil. The oil should shimmer and just begin to smoke before you add the roast.
This indicates the pan is hot enough for a rapid, effective sear.
Searing Every Side for Deep Color
Carefully place your seasoned, dry rump roast into the hot pan. You should hear an immediate sizzle. Let it sear undisturbed for several minutes, usually 3-5 minutes per side, until a rich, mahogany-brown crust forms. Use tongs to turn the roast and sear all sides, including the ends.
This process effectively seals in the juices and creates a depth of flavor that roasting alone cannot achieve.
Roasting Your Rump: The Gentle Approach
Once your rump roast has a gorgeous sear on all sides, it's ready for the oven. The goal here is gentle, even cooking to bring the roast to your desired internal temperature without drying it out.
Oven Temperature: Keeping it Steady
For rump roast, a moderate oven temperature is typically best. Preheating your oven to 325°F (160°C) allows the roast to cook through slowly and evenly. This temperature avoids cooking the exterior too quickly, which could lead to a tough, overdone surface by the time the center is ready.
Roasting Pan Setup
Transfer your seared roast to a roasting pan. Some cooks like to add about a cup of beef broth, water, or red wine to the bottom of the pan. This can help create a moist environment in the oven and provides liquid for making a pan sauce or gravy later. Place the roast directly in the pan, or on a rack if your pan includes one.
Understanding Doneness: Internal Temperatures Are Key
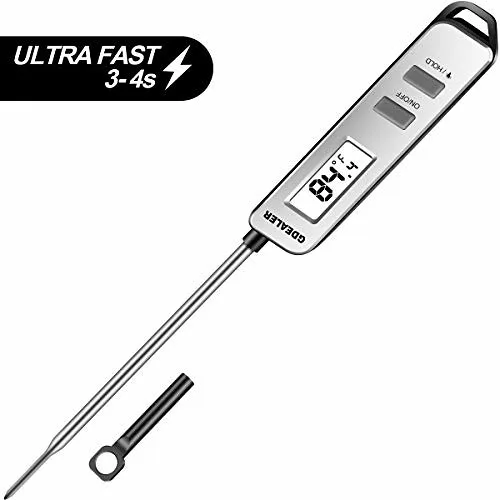
This is where precision truly matters. Relying solely on cooking time per pound is unreliable because roasts vary in density and shape. A reliable digital meat thermometer is your best friend. Aim to pull the roast from the oven when it's about 5-10°F below your target final temperature, as it will continue to cook while resting.
| Desired Doneness | Target Pull Temperature | Final Resting Temperature | Description |
|---|---|---|---|
| Rare | 115-120°F (46-49°C) | 125-130°F (52-54°C) | Deep red, very juicy. |
| Medium-Rare | 120-125°F (49-52°C) | 130-135°F (54-57°C) | Bright pink to red, very juicy. |
| Medium | 130-135°F (54-57°C) | 135-140°F (57-60°C) | Pink, still juicy. |
| Medium-Well | 140-145°F (60-63°C) | 145-150°F (63-66°C) | Slightly pink, less juicy. |
| Well-Done | 150-155°F (66-68°C) | 155-160°F (68-71°C) | Little to no pink, can be dry if overcooked. |
For rump roast, medium-rare to medium is generally considered ideal for balancing tenderness and flavor.
Resting: The Crucial Pause for Juiciness
After the roast comes out of the oven, resisting the urge to carve it immediately is absolutely critical. This resting period might seem like wasted time when hunger calls, but it’s as vital as the cooking itself.
Why You Must Wait
During cooking, the muscle fibers in the meat contract and force the juices toward the center. If you cut into it right away, those delicious juices will run out onto your cutting board, leaving you with a dry, less flavorful roast. Resting allows the muscle fibers to relax and reabsorb those juices, redistributing moisture throughout the entire cut.
How Long to Rest Your Roast
A general guideline is to let your roast rest for at least 15-20 minutes for smaller roasts, and up to 30 minutes for a larger one. Tent the roast loosely with aluminum foil during this time; this helps to trap residual heat and keeps the roast warm without continuing to cook it significantly. You’ll notice the internal temperature will climb a few extra degrees (carryover cooking) during this resting phase, bringing it to its final target doneness.
Carving and Serving Your Masterpiece
With your rump roast rested and juices beautifully redistributed, it’s time for the final step: carving and serving. This stage is straightforward, but one key technique can dramatically impact tenderness.
Slicing Against the Grain for Tenderness
Before you pick up your knife, take a moment to examine the roast. You'll see the muscle fibers running in a particular direction, this is the "grain" of the meat. To ensure your slices are as tender as possible, you must slice against this grain. This breaks up the long muscle fibers, making them easier to chew.
If you slice with the grain, the meat will feel tougher, regardless of how perfectly it was cooked. For a rump roast, slices about 1/4 to 1/2 inch thick are usually ideal.
Serving Suggestions
Arrange your carved slices on a warm platter. Pour any accumulated juices from the resting plate over the meat for added moisture and flavor. If you opted to make a pan sauce or gravy from the roasting pan drippings, this is the perfect time to drizzle it over the sliced roast. Serve immediately with your favorite accompaniments.
Serving Suggestions
Beyond just carving, how you serve your rump roast can elevate the entire experience. Consider pairing it with classic roast dinner staples like creamy mashed potatoes, roasted root vegetables (carrots, parsnips), or some steamed greens like Brussels sprouts or green beans. A side of horseradish sauce or a robust gravy made from the pan drippings complements the beef’s rich flavor beautifully. Ensure the serving dishes are warm to help maintain the roast's temperature as it's enjoyed.
Common Rump Roast Pitfalls to Sidestep
Even with the best intentions, a few common errors can derail your rump roast efforts. Understanding these pitfalls beforehand can help you avoid them. For instance, cooking a roast straight from the fridge without allowing it to reach room temperature is a frequent mistake that leads to uneven cooking.
Another common issue is impatience during the resting phase. Cutting into the roast too soon is almost guaranteed to result in a drier final product, as the juices haven't had time to redistribute. Overcooking is also a significant concern; relying on guesswork or overly aggressive heat will quickly turn a promising roast into shoe leather.
Finally, neglecting the sear or not getting the pan hot enough means missing out on a huge component of the roast's flavor and texture. Without that deep brown crust, the roast will lack that satisfying caramelized note and appealing visual appeal. Being mindful of these common errors will set you on the path to a much more successful roast.