

Making a fantastic latte at home often comes down to one crucial skill: frothing milk. It's the difference between a comforting warm drink and a velvety, cafe-quality beverage you'll crave every morning. Mastering how to froth milk for a latte unlocks a whole new world of coffee possibilities, let's dive in!
Getting that perfect creamy texture and achieving beautiful latte art isn't magic; it's a technique that relies on understanding milk's properties and using the right methods. Per industry standards, ideal microfoam for a latte should have a glossy sheen and be integrated seamlessly, not separate into watery liquid and dry foam.
Why Frothing the Milk is Key to a Great Latte
Frothing milk transforms plain liquid into a luxurious ingredient for coffee drinks. It involves introducing air into the milk while heating it, creating tiny, stable bubbles that form what's known as microfoam. This microfoam is essential for the distinct texture and visual appeal of a latte.
Understanding the Magic of Microfoam
Microfoam refers to very fine, even bubbles that create a smooth, glossy texture in milk. Unlike the large, airy bubbles you might get from simply shaking milk, microfoam is stable and integrates well with espresso. It’s what gives a latte its signature velvety mouthfeel, making it feel rich and luxurious on the palate.
The Look, Feel, and Taste of Perfectly Frosted Milk
The visual cues are just as important as the taste. Perfectly frothed milk should glisten, appearing almost wet but without any large, disruptive bubbles. When you swirl it in the pitcher, it should move smoothly and uniformly, like wet paint. This smooth texture, achieved by proper aeration and heating, enriches the espresso's flavor profile without overpowering it with sweetness that can come from scalded milk.
1. Frothing with an Espresso Machine Steam Wand (The Pro Method)
This is the most common method used by baristas and offers the highest quality foam. It requires an espresso machine equipped with a steam wand, which uses pressurized steam to heat and aerate milk. The goal here is to create that silky microfoam that’s perfect for latte art.
Step-by-Step Technique for Silky Smooth Foam
Here’s how to get that professional-quality froth using a steam wand.
- Prepare Your Milk: Start with cold milk, ideally whole milk as its fat content helps create stable foam. Pour it into a clean, cold metal pitcher, filling it about one-third to halfway full. Don't overfill, as the milk will expand.
- Purge the Steam Wand: Before inserting the wand into the milk, briefly turn on the steam to clear out any condensed water. This ensures you're using dry steam.
- Introduce Air (Stretching): Submerge the tip of the steam wand just below the surface of the milk, angled slightly. Turn the steam on fully. You should hear a gentle "kissing" sound, like tearing paper. Keep the wand tip near the surface for about 5-10 seconds. The milk should start to increase in volume by about 30-50%.
- Incorporate Air (Texturing): Lower the pitcher slightly so the steam wand is deeper into the milk. Angle the pitcher to create a whirlpool effect. Continue steaming, focusing on this swirling motion to break down any larger bubbles and integrate the air into a smooth, creamy texture.
- Monitor Temperature: Keep a hand on the side of the pitcher. When it becomes too hot to comfortably hold for more than a second or two (around 150°F or 65°C), turn off the steam. Don't overheat; scalding the milk ruins its flavor and frothing ability.
- Clean Up: Immediately remove the steam wand, wipe it clean with a damp cloth, and purge it again to clear any residual milk.
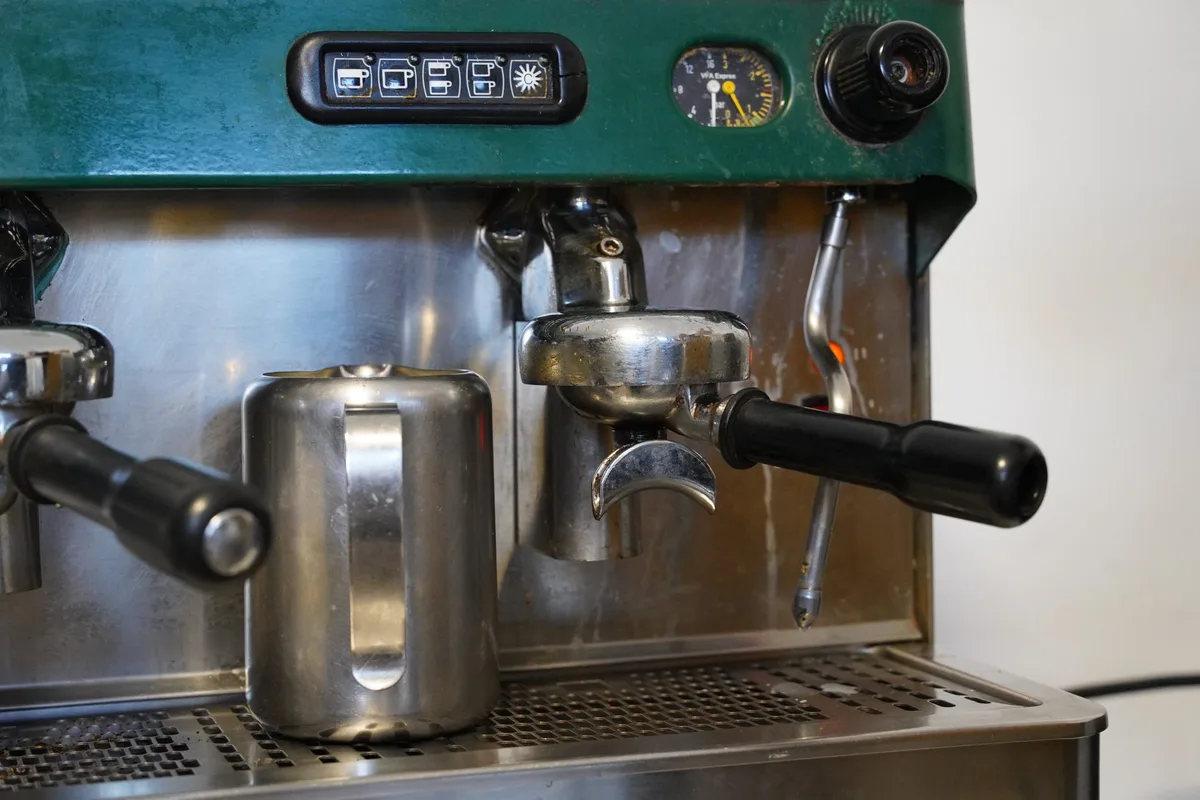
Image source: Openverse / Nilo Velez
Identifying the Right Milk Temperature Visual Cues
Beyond using a thermometer, paying attention to the pitcher's warmth is key. When the pitcher feels warm but not painfully hot, the milk is likely in the optimal temperature range of 130-150°F (55-65°C). Overheating the milk can lead to a "cooked" flavor and prevent proper foam formation.
The "Kissing" Sound: Introducing Air
This gentle "kissing" or slight hissing sound is your cue that you're correctly introducing air into the milk. It means the steam wand’s tip is just at the surface, creating tiny bubbles that will form the microfoam. If the sound is loud or aggressive, you're likely creating too many large bubbles.
The Vortex: Creating Creamy Texture
Once you've introduced enough air, submerging the wand deeper and angling the pitcher creates a powerful vortex. This swirling motion is crucial for breaking down any large bubbles and distributing the air evenly throughout the milk, resulting in that desirable silky texture.
Common Steam Wand Mistakes to Avoid
- Too much noise: Loud hissing means large bubbles; adjust wand position.
- Not enough air: If the milk volume doesn't increase, the wand is too deep.
- Overheating: Scalds milk and ruins texture; use your hand as a guide.
- Forgetting to purge/clean: Can clog the wand and affect future frothing.
2. Frothing Milk with a French Press (The Clever Hack)
If you don't have an espresso machine with a steam wand, a French press can be a surprisingly effective tool for frothing milk at home. It's an accessible alternative that still allows for decent aeration and texture.
Simple Steps for Decent Foam Without a Machine
- Heat Your Milk: Gently warm up your milk on the stovetop or in the microwave. Aim for a temperature between 140-150°F (60-65°C). Don't let it boil.
- Pour into French Press: Pour the warm milk into your French press, filling it no more than one-third full.
- Plunge Vigorously: Place the lid on the French press and rapidly move the plunger up and down. Do this for about 30-60 seconds. You're essentially using the mesh plunger to whisk air into the milk.
- Let it Settle: Allow the frothed milk to rest in the French press for about 30 seconds to a minute. This helps the foam separate slightly from the liquid milk.
- Pour: Carefully pour the milk, holding back the foam with a spoon if necessary, then spoon or pour the foam on top of your espresso drink.
Why This Works (and What to Expect)
The French press acts like a manual whisk. The rapid plunging action forces air into small spaces within the milk, creating foam. While it might not achieve the same ultra-fine microfoam as a steam wand, it can produce a good, frothy layer that adds texture to your latte. The foam tends to be a bit larger and less integrated than with steam, so it’s good for drinks where you want distinct foam, like a cappuccino.
3. Frothing Milk with a Handheld Wand (The Quick Fix)
For an even more budget-friendly and portable option, a handheld milk frother is a practical choice. These battery-operated devices are designed to create foam quickly and easily, making them great for everyday use.
How to Use Your Battery-Powered Frother
- Heat Your Milk: Warm your milk to your desired temperature, usually around 140-150°F (60-65°C). Microwaving for about 60-90 seconds usually works well.
- Pour into a Mug: Pour the warm milk into a mug or a tall, narrow container. This shape helps contain the foam as it builds.
- Froth: Submerge the whisk end of the frother just below the milk's surface and turn it on. Move the frother around gently in a circular motion. As foam begins to form, you can lower the frother deeper into the milk to thicken and integrate the foam. Continue for 20-40 seconds, or until you achieve the desired consistency.
- Pour and Enjoy: Pour the frothed milk over your espresso. The foam created by these wands is typically lighter and bubblier than true microfoam, but it's still a significant upgrade for your homemade lattes.
Getting the Best Foam from a Wand
The key is to move the wand around in a way that creates both aeration and a swirling motion. Start near the surface to incorporate air, then move it deeper to emulsify the foam. Clean the whisk attachment immediately after use to prevent milk drying on it.
Milk Choice Matters for Frothing Success
The type of milk you choose can significantly impact the quality and ease of frothing. Our research indicates that fat and protein content are the biggest determining factors in how well milk froths.
Whole Milk: Your Reliable Go-To
For most home baristas starting out, whole milk is the easiest to work with. Its higher fat content creates a stable, rich, and creamy foam that’s forgiving of minor technique errors. The fat molecules provide structure, helping to trap air bubbles and create that desirable velvety texture without easily dissipating. When tested against other dairy options, whole milk consistently yields the most consistent results.
Other Dairy Options: What to Expect
- 2% Milk: This milk can froth well, but the foam may be slightly less stable and rich compared to whole milk. You might need to be a bit more precise with your technique.
- Skim Milk: This milk froths very quickly and can achieve a lot of volume, but the foam is often foamy and less creamy, with larger bubbles that dissipate faster. It lacks the richness that fat provides.
Non-Dairy Milks: The Pros and Cons for Foam
Frothing non-dairy alternatives presents a unique set of challenges and rewards. As of 2026, many "barista" versions of these milks are specifically formulated to improve their frothing capabilities.
Oat Milk for Frothing
Oat milk is often cited as one of the best non-dairy options for frothing. Its natural sweetness and creamy texture, due to its carbohydrate and fat content, allow it to create foam that can rival dairy milk. "Barista edition" oat milks are specifically designed with stabilizers and a balance of fats and proteins to froth more like dairy, producing a nice sheen and a good amount of stable foam.
Soy, Almond, and Coconut Milk Nuances
- Soy Milk: Can produce a decent foam, but it sometimes results in larger, more bubbly foam that can be less stable. The protein content is generally good for frothing.
- Almond Milk: This is typically one of the more challenging non-dairy milks to froth effectively. Its low fat and protein content means it often produces a thin, bubbly foam that’s prone to separating quickly. "Barista" versions are essential if you want decent results.
- Coconut Milk (Canned): Full-fat canned coconut milk, when chilled, can create a very rich and decadent foam due to its high fat content. However, it imparts a distinct coconut flavor that may not be desirable in all coffee drinks. Regular carton coconut milk usually has too low a fat content to froth well.
Troubleshooting Your Milk Frothing Efforts
Even with the best intentions, sometimes your milk frothing just doesn't come out right. Don't worry; most issues have simple fixes. A common problem, especially for beginners, is encountering too many large bubbles when you're trying to aerate the milk.
Dealing with Big Bubbles
If your frothed milk looks more like dish soap bubbles than silky microfoam, you've likely introduced too much air too quickly or at the wrong stage. The sound you hear when frothing is a good indicator. A loud, spattering hiss means you're creating large bubbles. You want a gentler tearing sound.
To fix this, try submerging the steam wand tip a bit deeper into the milk during the aeration phase. Ensure the wand is angled correctly to create a swirling vortex, which helps break down those larger bubbles into smaller ones. If you end up with large bubbles on the surface after frothing, gently tap the pitcher on the counter a few times and swirl the milk.
What If My Milk Won't Froth?
If you're getting very little to no foam, it could be a few things. Firstly, ensure your milk is cold. Warm milk doesn't aerate as well, and if it's not cold enough to begin with, it might reach scalding temperatures before it can build volume. Manufacturer specifications for many espresso machines suggest starting with milk at or below 40°F (4°C).
Secondly, the type of milk matters. As discussed, some non-dairy milks, especially almond milk, are notoriously difficult to froth. If you're using an alternative, ensure it's a "barista" blend. Also, consider the age of your milk; older milk has a lower protein content, making it harder to stabilize foam.
Preventing Scalded Milk Flavor
Scalded milk, or milk that's been overheated, tastes unpleasant and loses its natural sweetness. This typically happens when the steam wand is left too deep in the milk for too long. The key indicator is the temperature of the pitcher. When it becomes too hot to hold comfortably for more than a moment, the milk is likely approaching or exceeding 150°F (65°C).
To prevent this, get into the habit of keeping one hand on the side of the metal pitcher. As soon as it feels too hot to touch for longer than a second or two, turn off the steam. It's better to slightly under-heat your milk and potentially get slightly less foam volume than to scald it and ruin the taste.
Expert Tips for Next-Level Frothing
Beyond the basic techniques, a few pro tips can elevate your milk frothing game. These are the small details that baristas use to consistently achieve beautiful results.
Maintaining Your Steam Wand
Proper maintenance of your steam wand is crucial for both hygiene and performance. After each use, you should immediately wipe down the wand with a damp cloth to remove any milk residue. Then, give it a quick blast of steam (purge) to clear any milk that might have gotten inside the tip. This prevents milk from drying and clogging the small holes in the wand.
Over time, mineral buildup can occur. Many espresso machine manufacturers recommend a descaling process for the steam wand and other components. Following the manufacturer's instructions for cleaning and descaling will ensure your steam wand operates at peak efficiency, delivering consistent steam pressure for optimal frothing.
Pouring for Latte Art
The pouring technique is as critical as the frothing itself for creating latte art. Once you have perfectly frothed milk, you need to pour it skillfully onto your espresso. Start by holding the pitcher relatively high above the espresso and pouring a thin stream. This allows the milk to mix evenly with the crema.
As the cup fills, lower the pitcher closer to the surface of the coffee. This is when you can start creating patterns by gently wiggling the pitcher or tilting it to create shapes like hearts, rosettas, or tulips. The goal is to have the creamy microfoam integrate with the espresso, not sit on top as a separate layer.
Which Frothing Method is Best for You?
Choosing the right frothing method depends largely on the equipment you have and the results you're looking for. If you own an espresso machine with a steam wand, that's generally your best bet for achieving true microfoam and enabling latte art. It offers the most control and the highest quality texture.
A French press is an excellent alternative if you don't have a steam wand, providing a decent frothy topping for cappuccinos or lattes. It's accessible and requires no special equipment beyond what many kitchens already have. The handheld frother is the quickest and most affordable option for adding a bit of foam to your coffee drink. It's best for a simple foamy layer rather than intricate latte art.