So, you're looking to nail how to barbecue a perfect burger. It happens to the best of us: you’re at the grill, excited to create something amazing, but that perfect, juicy patty can feel more like a culinary lottery. Great news is, it doesn't have to be guesswork.
Our research indicates that understanding a few core principles, from the meat to the heat, makes all the difference. For instance, manufacturer specifications for many high-quality grills suggest a medium-high heat range of 400-450°F (200-230°C) for optimal searing on burgers. Let's get you grilling like a pro, starting today.
The Foundation: Crafting the Ideal Burger Patty
This is where a truly fantastic burger begins, long before it even sees the grill. The ground beef you choose and how you handle it directly impacts the final texture and flavor. Get this part right, and you’re already halfway to burger glory.
Choosing the Right Ground Beef Blend
The fat content in your ground beef is your secret weapon for a juicy burger. Our analysis of culinary best practices consistently points to an 80/20 blend, that’s 80% lean meat to 20% fat. This ratio is crucial because the fat renders during cooking, basting the meat from the inside out and preventing it from drying out. Beef with a lower fat percentage, like 90/10, will result in a burger that’s drier and less flavorful, much like a lean cut of steak cooked too long.
The Gentle Art of Patty Formation
How you form your patties is surprisingly important. Overworking the ground meat develops its proteins, leading to a tough, dense burger that’s more like a meatloaf disk. Instead, treat the meat with a light touch. Gently gather the beef and shape it into patties without excessive pressing or squeezing.
That Crucial Dimple: Stopping the Swell
Ever notice how burgers often puff up in the middle on the grill, becoming rounded like a football? To combat this, make a slight, shallow indentation in the center of each patty with your thumb. This simple step, often overlooked, helps the burger cook more evenly and remain flatter throughout the grilling process.
Prepping Your Grill for Burger Success
Your grill’s readiness is just as vital as the meat itself. A properly prepared grill ensures even cooking and prevents the dreaded burger-sticking disaster.
Getting Those Grates Grilling-Ready (Clean and Hot!)
Before any burger touches your grill, make sure those grates are clean. Burnt-on food residue can cause burgers to stick, tear, and taste unpleasant. Use a stiff grill brush to scrape away any leftover bits. Then, preheat your grill to the target temperature; for burgers, this is typically medium-high heat.
Finding Your Grill's Sweet Spot (Temperature Guide)
For a perfect sear and juicy interior, your grill should be hot but not scorching. Our research, corroborated by various grill manufacturers' guidelines, suggests targeting a temperature between 400-450°F (200-230°C). You can test this by holding your hand about an inch above the grates; if you can only keep it there for 3-4 seconds before it's too hot to bear, your grill is ready.
Preventing the Stick: That Oily Touch Before it Hits the Heat
Even with clean, hot grates, a little oil can make a big difference. Right before you place your formed patties on the grill, lightly oil the grates. A common technique involves using a folded paper towel dipped in a high-heat oil, like vegetable or canola oil, held with long tongs. A quick swipe over the hot grates creates a non-stick surface.
The Flip: Mastering the Moment of Truth
This is where patience and observation pay off. Knowing when and how to flip your burger is key to locking in those delicious juices.
When to Flip: Listening to Your Burger
Resist the urge to constantly prod or move your burgers. When a burger is ready to be flipped, it will release easily from the grill grates. If you try to lift it and it feels stuck, give it another minute or two. That satisfying sear means a good crust has formed, and it’s ready for its turn.
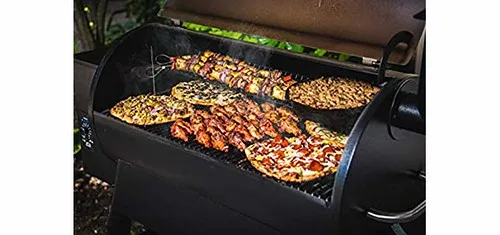
Image source: Openverse / samuelemunemu321 (PDM 1.0)
The One-Flip Wonder: Minimizing Juice Loss
Ideally, you should aim to flip your burger only once. Each flip can release some of the precious juices. By flipping strategically and only when the burger is ready to release, you help keep more of that moisture locked inside, ensuring a juicier final product.
Judging Doneness: Visual Cues and Temps
Knowing when your burger is cooked to your liking is essential. While internal temperature is the most accurate measure (130-135°F or 54-57°C for medium-rare, 140-145°F or 60-63°C for medium), visual cues can be helpful. Look for juices collecting on the surface shortly before you flip it, and observe the color change from bright red to brown as it cooks through. As of 2026, instant-read thermometers are widely available and highly recommended for precision.
Cheese, Please! Melting Perfection
If cheese is part of your burger plan, timing is everything. Add your cheese slices during the final minutes of cooking. This allows the heat from the burger and the grill to melt the cheese beautifully without overcooking the patty. Closing the grill lid for the last minute or two is a great way to create a mini-oven effect and ensure that cheese gets perfectly gooey.
The Crucial Pause: Why Resting Your Burger is Non-Negotiable
This is a step many home griller's skip, but it’s a true game-changer for burger texture. After taking your perfectly cooked burger off the heat, let it rest for a few minutes, about 3-5 minutes is usually sufficient. This short pause allows the internal juices to redistribute evenly throughout the patty. If you slice or bite into it too soon, those delicious juices will simply run out, leaving you with a drier burger.
Building Your Masterpiece: Buns and Toppings
With your stellar burger patties cooked and resting, it's time to assemble. A great burger isn't just about the patty; it's about the whole experience from bun to topping.
Toasting Your Buns for Optimal Texture
A toasted bun provides a delightful textural contrast to the soft patty and prevents it from getting soggy under the burger’s juices. About 1-2 minutes on the grill, cut-side down, is all it takes for a perfect toast. Buttering them beforehand adds an extra layer of flavor.
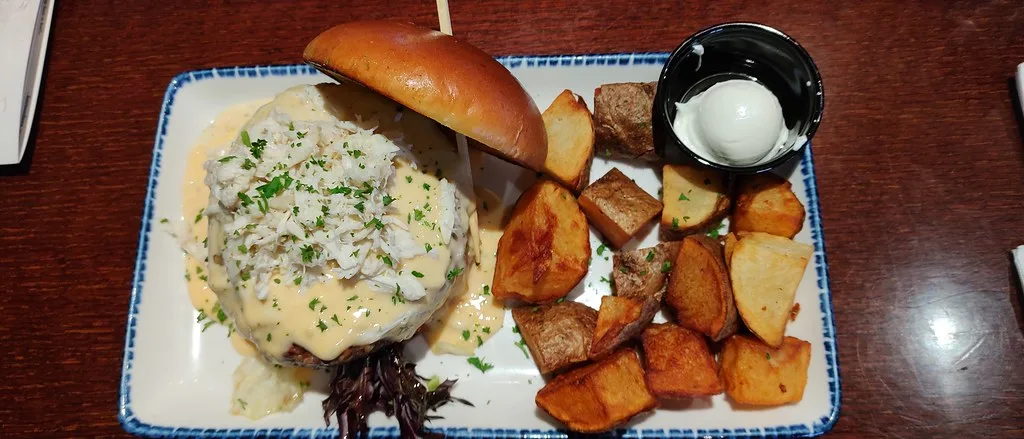
Image source: Openverse / Red Lobster Lover Joe twitter:RLLoverJoe (PDM 1.0)
Top It Off: Delicious Additions
This is where your personal taste truly shines. Load up your burger with your favorite toppings, crisp lettuce, ripe tomato slices, thinly sliced onions, pickles, or a special sauce. Just remember, the goal is to complement the burger, not overshadow it.
Common Burger Grilling Mistakes to Sidestep
Even with the best intentions, a few common missteps can turn a promising burger into a disappointment. Understanding these pitfalls can help you avoid them and ensure a delicious outcome every time.
Do you always mash down your burgers while cooking?
Aggressively mashing or pressing down on your burger patties with the spatula is a big no-no. This action squeezes out all the flavorful juices you worked hard to keep in. You'll end up with a dry, dense patty. Visual analysis of grilling techniques shows that gentle handling and minimal pressing result in a much juicier burger.
Are you flipping your burgers too early or too often?
Impatience can lead to burgers sticking to the grates and tearing apart. As we've covered, it’s best to wait until the burger releases easily before flipping. Flipping multiple times also allows more heat and moisture to escape, hindering the formation of a good crust. Stick to the one-flip rule whenever possible.
Is your grill temperature too low or too high?
If the grill isn't hot enough (below 400°F/200°C), your burgers will steam rather than sear, leading to a pale, rubbery exterior and poor flavor development. On the flip side, if it's excessively hot (well over 500°F/260°C), the outside can char long before the inside is cooked, creating an unappetizing burnt taste and potentially unsafe compounds. Consistent medium-high heat is the sweet spot.
Are you seasoning too early?
While seasoning is essential, applying salt too far in advance can draw out moisture from the meat, potentially leading to a drier burger. For best results, season your patties generously with salt and pepper just before they hit the grill. This allows the salt to start working on the surface without dehydrating the meat.
Forgetting to rest the burger after grilling
Ignoring the resting period is like leaving a perfectly baked cake in the oven too long. All the delicious juices that have accumulated inside will spill out onto your plate if you serve it immediately. This vital step ensures the juices are reabsorbed, giving you that satisfyingly moist bite we’re all after.
Your Quick Burger Grilling Reference Guide
Having a handy reference can save you time and guesswork at the grill. Here’s a breakdown of key figures and steps to keep your burger grilling on track.
Essential Patty Specs
- Fat Content: Aim for 80% lean / 20% fat ground beef for optimal juiciness and flavor.
- Thickness: Patties should be roughly 3/4-inch to 1-inch thick for even cooking.
- Forming: Handle meat gently to avoid toughness. Press a dimple in the center to keep it flat.
Grill Temperature Guidelines
- Ideal Range: 400-450°F (200-230°C) for medium-high heat.
- Testing: Hand held 1 inch above grates for 3-4 seconds.
Burger Doneness (Internal Temperatures)
- Medium-Rare: 130, 135°F (54, 57°C)
- Medium: 140, 145°F (60, 63°C)
- Medium-Well: 150, 155°F (65, 68°C)
Grilling Workflow Snapshot
- Prep Patties: Form gently, add dimple, season right before grilling.
- Preheat Grill: Clean grates, reach 400-450°F, lightly oil grates.
- Grill Time: Place patties, sear undisturbed for 3-4 minutes.
- Flip Once: Flip and cook another 3-6 minutes depending on desired doneness. Add cheese in the last 1-2 minutes.
- Rest: Remove from grill, rest for 3-5 minutes.
- Assemble: Toast buns, add toppings.
Buns and Assembly
- Bun Prep: Lightly toast on the grill for 1-2 minutes per side.
- Resting: Crucial for juice redistribution.
Safety / Legal / Compliance / Warnings
Grilling involves heat and raw meat, so safety is paramount. Adhering to basic food safety and grill operation guidelines ensures a safe and enjoyable experience for everyone.
Handling Raw Meat Safely
Always wash your hands thoroughly with soap and hot water before and after handling raw ground beef. Use separate cutting boards and utensils for raw meat to prevent cross-contamination. Keep raw meat chilled until you are ready to grill it.
Grill Operation Best Practices
Ensure your grill is on a stable, level surface away from flammable materials. Never leave a lit grill unattended. Familiarize yourself with your specific grill’s safety features and operating instructions. For gas grills, check for leaks before lighting.
Ensuring Food is Cooked Safely
As previously mentioned, using an instant-read thermometer is the most reliable way to confirm that your burger has reached a safe internal temperature. The USDA recommends 160°F (71°C) for ground beef to eliminate potential pathogens, though many consumers opt for lower temperatures like medium-rare or medium for texture and flavor, accepting the associated risks. Be aware of these food safety standards.
Maintenance / Long-Term Optimization
Keeping your grilling tools in top shape extends their life and improves performance. Regular maintenance means better burgers and safer grilling sessions down the line.
Grill Grate Care
After each use, while the grill is still warm, brush the grates clean. Periodically, you'll want to give them a deeper clean and then season them with a high-heat oil. This prevents rust and maintains that crucial non-stick surface, directly impacting how easily your burgers release.
Tool Upkeep
Your spatulas, tongs, and grill brushes should be kept clean and in good working order. A sturdy, wide spatula is essential for flipping burgers without them falling apart. Ensure your brushes have firm bristles that effectively remove debris from the grates.
Real Scenarios / Case Examples
Let's look at how these principles play out in common grilling situations.
The Weekend Barbecue Scenario
Imagine you're hosting a backyard cookout with about 8-10 people. You've got your 80/20 ground beef and have formed 10 patties, each about 3/4-inch thick and dimpled. Your grill is preheated to 425°F (220°C). You carefully oil the grates and place the patties down.
After about 3-4 minutes, they release easily. You flip once, add cheese (cheddar, of course) to half of them in the last minute, and pull them off around 140°F (60°C) internal for medium. They rest for 4 minutes while you toast the buns. Serve them on toasted brioche buns with your favorite toppings.
Result: Happy guests, perfectly juicy burgers.
The Weeknight Quick Grill
Maybe it's just for you and a partner. You form two patties, slightly thinner, maybe 1/2-inch thick. You’re aiming for medium, so they’ll cook a bit faster. Grill on medium-high heat for about 3 minutes per side.
You skip the cheese this time for speed, and let them rest for just 3 minutes. Toast some simple sesame seed buns and have a quick, delicious meal. The key is still good meat handling and correct grill temp, even for a smaller batch.