If you've ever hesitated to cook a bone-in prime rib roast, thinking it's too complex, we've got you covered. Learning how to make prime rib bone in can transform your holiday meals or special dinners from good to unforgettable. It's all about understanding a few key principles that lead to that perfect, juicy result.
Achieving that deeply browned crust and tender, pink interior isn't magic; it's a process. Our research and analysis of cooking best practices confirm that key factors like proper tempering and accurate temperature monitoring, often guided by USDA standards for beef grading, play a vital role. Let's break down how to master this impressive cut.
Why Bone-In is Your Friend
Choosing a bone-in prime rib, often called a standing rib roast, offers distinct advantages over its boneless counterpart. The presence of the rib cage isn't just for aesthetics; it fundamentally impacts the cooking and flavor profile of the meat.
Flavor, Even Cooking, and Stability
- Flavor Infusion: The bone marrow and connective tissues within the rib cage release a rich, beefy essence into the surrounding meat as it cooks. This natural basting effect is a significant contributor to the roast's overall depth of flavor.
- Even Cooking: The bone acts as a natural insulator. It helps to temper the heat, allowing the meat closer to it to cook more gently. This generally leads to a more consistent level of doneness throughout the roast compared to boneless cuts where heat can reach the center more rapidly.
- Stability and Support: For larger roasts, the bone provides a sturdy base, helping the prime rib maintain its shape during cooking and making it easier to handle and carve after resting.
The Prep Work: Setting the Stage for Success
Getting ready for your prime rib roast is more than just seasoning; it's about setting the conditions for optimal cooking. A few deliberate steps upfront prevent common pitfalls down the line.
Tempering Your Roast: Room Temp is Key
The single most critical preparation step is allowing your bone-in prime rib to reach room temperature. This means taking it out of refrigeration at least 2 to 3 hours before cooking. A cold roast placed directly into a hot oven will cook unevenly. The exterior will cook much faster than the interior, often resulting in a gray, overcooked band around a potentially raw center.
For a roast weighing 5-7 pounds, aim for at least 2 hours, and for larger roasts (7-10+ pounds), extend this to 3 hours.
Patting Dry for the Perfect Crust
Moisture on the surface of your meat is the enemy of a good sear. Before applying any seasonings, you must thoroughly pat the entire surface of the prime rib dry with paper towels. Press down gently to absorb as much surface moisture as possible. This allows the Maillard reaction, the complex chemical process responsible for browning and flavor development, to occur efficiently, creating that desirable deep-brown, caramelized crust.
Seasoning Essentials: Simple Rules for Maximum Flavor
For a high-quality bone-in prime rib roast, less is often more. The beef itself has incredible flavor that shouldn't be masked by overpowering seasonings.
- The Foundation: Coarse kosher salt and freshly cracked black pepper are paramount. Generously season all sides of the roast, ensuring even coverage. The salt not only adds flavor but also helps to draw out a small amount of moisture, which then gets reabsorbed, contributing to a more tender result.
- Enhancements (Optional): If you desire additional complexity, consider a light dusting of garlic powder or onion powder. Herbs like fresh rosemary and thyme, finely chopped or whole sprigs tucked around the roast, can also impart subtle aromas. Avoid pre-made rubs with high sugar content, as sugar can burn quickly at the high temperatures used for searing.
The Cooking Process: Heat, Patience, and Visual Cues
Cooking a bone-in prime rib is a two-stage process. We start with a high heat to build that beautiful crust, then lower the temperature to cook the interior gently and evenly.
Stage 1: The Searing High Heat
Begin by preheating your oven to a high temperature, typically 450°F (230°C). While the oven heats, place your seasoned bone-in prime rib roast, bone-side down, into a sturdy roasting pan. If the roast doesn't sit level, you can create a small "cushion" by folding two lengths of heavy-duty aluminum foil lengthwise and placing them under the roast to lift it slightly.
Once the oven reaches temperature, place the roasting pan with the prime rib into the center of the oven. Allow it to sear for approximately 15, 20 minutes. This initial blast of heat is crucial for initiating the caramelization process and developing the flavorful exterior crust. Monitor closely to ensure it doesn't burn; if it's browning too rapidly, you can slightly reduce the oven temperature.
Stage 2: The Gentle Cook & Reading Your Roast
After the initial searing period, reduce the oven temperature to a lower setting, typically 325°F (160°C). This lower, consistent heat will gently cook the interior of the roast to your desired level of doneness without drying it out. The cooking time will vary significantly based on the size of your roast, the accuracy of your oven, and how you prefer your steak cooked.
- General Guideline: For a medium-rare finish, a common baking time is around 13 to 15 minutes per pound. However, this is just an estimate.
- The True Indicator: Relying solely on time can be risky. The most accurate method for assessing doneness is through internal temperature.
Your Meat Thermometer is Your Best Friend (and How to Use It)
A high-quality instant-read meat thermometer is an indispensable tool for cooking prime rib perfectly. It bypasses guesswork and provides precise information about the roast's internal temperature.
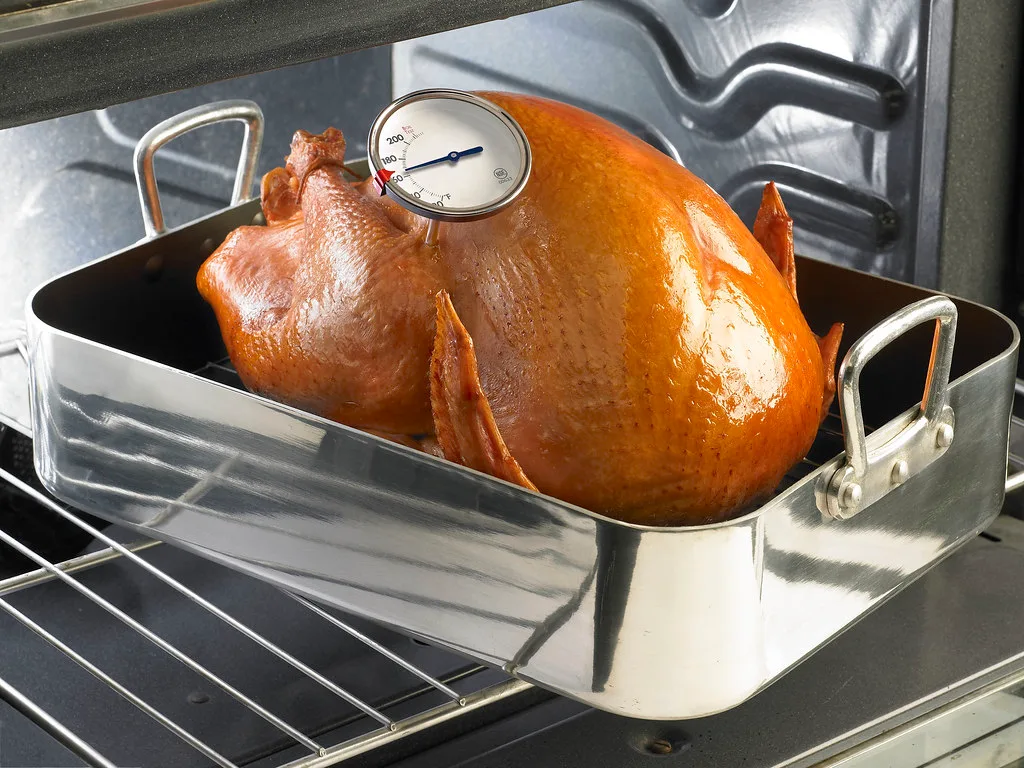
This is because the temperature at which meat is removed from the heat source will continue to rise as it rests, a process known as carryover cooking. Therefore, you should remove the roast from the oven when it's about 5°F (3°C) below your final target temperature.
Internal Temperatures for Perfect Doneness (Target Removal Temperatures)
| Desired Doneness | Target Internal Temperature (°F) | Target Internal Temperature (°C) |
|---|---|---|
| Rare | 110–115°F | 43–46°C |
| Medium-Rare | 120–125°F | 49–52°C |
| Medium | 130–135°F | 54–57°C |
| Medium-Well | 140–145°F | 60–63°C |
Insert the probe of your thermometer into the thickest part of the roast, ensuring it does not touch the bone, as this can give an inaccurate reading. For example, if you aim for a final medium-rare temperature of 130°F (54°C), you would pull the roast from the oven when it reaches 120, 125°F (49, 52°C). As of 2026, digital instant-read thermometers are widely available and highly recommended for their speed and accuracy.
The MOST Important Step: Resting Your Prime Rib
You've wrestled the beast into submission, it's sitting there looking gorgeous, and you're tempted to carve it right away, aren't you? Hold that thought. This step is often overlooked, but it's absolutely critical for juicy, tender meat. Skipping this will undermine all your hard work.
Why Resting is Non-Negotiable
When meat cooks, the muscle fibers tense up and contract, pushing the juices towards the center. If you cut into it immediately, those juices will spill out onto your cutting board, leaving you with dry, less flavorful meat. Resting allows those muscle fibers to relax and reabsorb the juices.
This process is akin to letting a complex system stabilize after a change. Proper resting ensures that the moisture redistributed throughout the roast remains inside the meat, rather than escaping. You're essentially letting the roast finish its internal redistribution of juices, making every slice incredibly succulent.
How Long to Let It Relax
The general rule of thumb is to let your bone-in prime rib rest for at least 20, 30 minutes. For larger roasts, especially those over 7 pounds, extending this resting period to 45 minutes is highly recommended. Loosely tent the roast with aluminum foil during this time. This traps enough heat to keep it warm without continuing to cook it significantly, allowing the juices to settle and redistribute evenly.
Caring for Your Prime Rib: The Art of Carving
Once that crucial resting period is over, it's time for the grand finale: carving. A well-rested prime rib will yield beautiful slices. The bone actually makes carving a bit more straightforward because it provides natural guides.
Slicing Between the Ribs
First, you'll want a sharp carving knife. Place your roast on a stable cutting board, bone-side up or down, whichever feels more comfortable. Identify the spaces between the rib bones. Because the bones are curved, you'll often find the easiest approach is to start by slicing down into the meat right alongside a bone.
Follow the natural contour of the bone as you slice. You're aiming to separate the main muscle from the bones. Work your way along each rib, making clean cuts. This method allows you to produce slices that are mostly free of bone fragments and retain their structure.
When Things Don't Go Exactly as Planned: Troubleshooting
Even with the best preparation, sometimes minor issues can crop up. Don't fret; most cooking challenges have straightforward solutions. Our research indicates that understanding these common problems helps prevent them in the future.
Addressing a Too-Dark Crust
If you notice the exterior crust of your prime rib is browning too much or starting to burn before the internal temperature reaches your target, don't panic. Loosely tent the roast with aluminum foil. This creates a barrier that shields the surface from direct heat, slowing down further browning while allowing the interior to continue cooking to doneness.
Fixing a Still-Raw Center
Should you pull your roast out and discover the center is still too pink or undercooked for your liking, it’s not a lost cause. You can return it to the oven. Lower the oven temperature slightly, perhaps to 300°F (150°C), and continue cooking, checking the internal temperature every 15, 20 minutes. This allows for more gentle cooking to reach your desired doneness without further toughening the already cooked outer layers.
Preventing Dryness Next Time
The most frequent culprit behind a dry prime rib is insufficient resting time or overcooking. Always commit to that resting period, it truly makes a difference. For cooking, pay meticulous attention to your meat thermometer, and remember to pull the roast when it's 5°F below your target temperature, accounting for carryover cooking. Proper tempering also prevents the exterior from overcooking while the inside catches up.
Expert Tips for Prime Rib Perfection
Beyond the basic steps, a few pro techniques can elevate your bone-in prime rib from good to exceptional. These tips come from years of culinary practice and a deep understanding of how beef cooks.
- Consider a Reverse Sear: For an incredibly even cook from edge to edge, try a reverse sear method. You roast the prime rib at a low temperature (around 200, 250°F or 95, 120°C) until it's about 10, 15°F below your target. Then, you finish it with a very high-heat sear (maybe in a screaming hot cast-iron pan on the stovetop or a broiler) to create the crust. This technique minimizes the gray band of overcooked meat.
- Deglaze the Pan: After resting and carving, the leftover drippings in your roasting pan are pure gold. Deglaze the pan with a bit of beef broth, wine, or even water, scraping up all the browned bits. This forms the base for an incredible au jus or gravy.
- Bone Guards: If you’re concerned about the exposed rib bones burning during the high-heat searing stage, you can buy or make "bone guards" fashioned from aluminum foil to cover them. This is purely for aesthetic and prevention; it doesn't impact cooking otherwise.
Common Mistakes to Avoid with Bone-In Prime Rib
We’ve touched on a few but let’s consolidate the most critical missteps that can derail your prime rib efforts. Recognizing these will help you steer clear of a disappointing dinner.
- Ignoring Tempering: Pulling a roast straight from the fridge and putting it in the oven is the fastest route to uneven cooking. Always allow at least 2 hours for tempering.
- Skipping the Rest: This is non-negotiable for juiciness. If you're short on time, start your roast earlier so it finishes with adequate resting time.
- Relying Solely on Time: Ovens vary, and so does the exact thickness and composition of roasts. A meat thermometer is your most reliable tool.
- Over-Seasoning: Let the quality of the beef shine. A simple salt and pepper treatment is often all you need.
- Cutting Too Soon: As mentioned, resting is key. Patience here directly translates to succulence.